Mastering DJI Mavic 4 Pro: First Use Tutorial with RC Pro 2: The Ultimate Guide
So you’ve just unboxed your shiny new DJI Mavic 4 Pro with the RC Pro 2 controller – congratulations! This powerhouse combo delivers cinema-grade imaging, intelligent flight features, and a seamless user experience. But before you launch into the sky, it’s crucial to get the basics right. A smooth first flight starts with proper setup, activation, and understanding of core controls. This guide walks you through every step – from powering on to landing safely – so you can fly with confidence from day one.
The Checklist
- Unbox and inspect: Remove all protective covers, including the gimbal protector and storage strap.
- Check battery levels: Ensure both the drone and RC Pro 2 are charged (use the USB-C port on the drone and included charger for the controller).
- Unfold correctly: Fully extend all four arms – especially the right rear arm, which triggers automatic power-on.
- Install propellers: Confirm they’re securely attached (pre-installed at factory, but double-check for damage).
- Update firmware: Connect to Wi-Fi during activation to ensure you’re running the latest software via DJI Fly.
- Practice in simulator: Use the built-in flight simulator on RC Pro 2 before your real flight.
The First Step
Start by preparing your aircraft. Remove the storage cover and unfasten the strap holding the gimbal protector – this must be taken off before powering on, or the drone won’t pass self-diagnostics. Next, press the power button once to activate the battery and check the LED indicators for charge level. Now unfold all arms fully; when you extend the right rear arm, the Mavic 4 Pro will automatically power on (you’ll hear a soft chime and see status LEDs light up). If it doesn’t, press and hold the power button for two seconds.
While the drone boots up, turn your attention to the RC Pro 2. Unfold the antennas downward and lift the screen – it powers on automatically. You’ll see the DJI Fly interface appear. If this is your first time using the controller, it needs internet-based activation: follow the on-screen prompts to complete the process. Once both devices are on, they should link automatically if purchased as a combo. If not, go to Settings > Controller > Pair Aircraft in DJI Fly.
Step 2: Configuration
With everything powered and linked, open the DJI Fly app on the RC Pro 2 screen. The app will prompt you to activate the Mavic 4 Pro – keep your internet connection stable during this step. After activation, check for firmware updates under Settings > About. Always update before flying to access the latest features and safety enhancements.
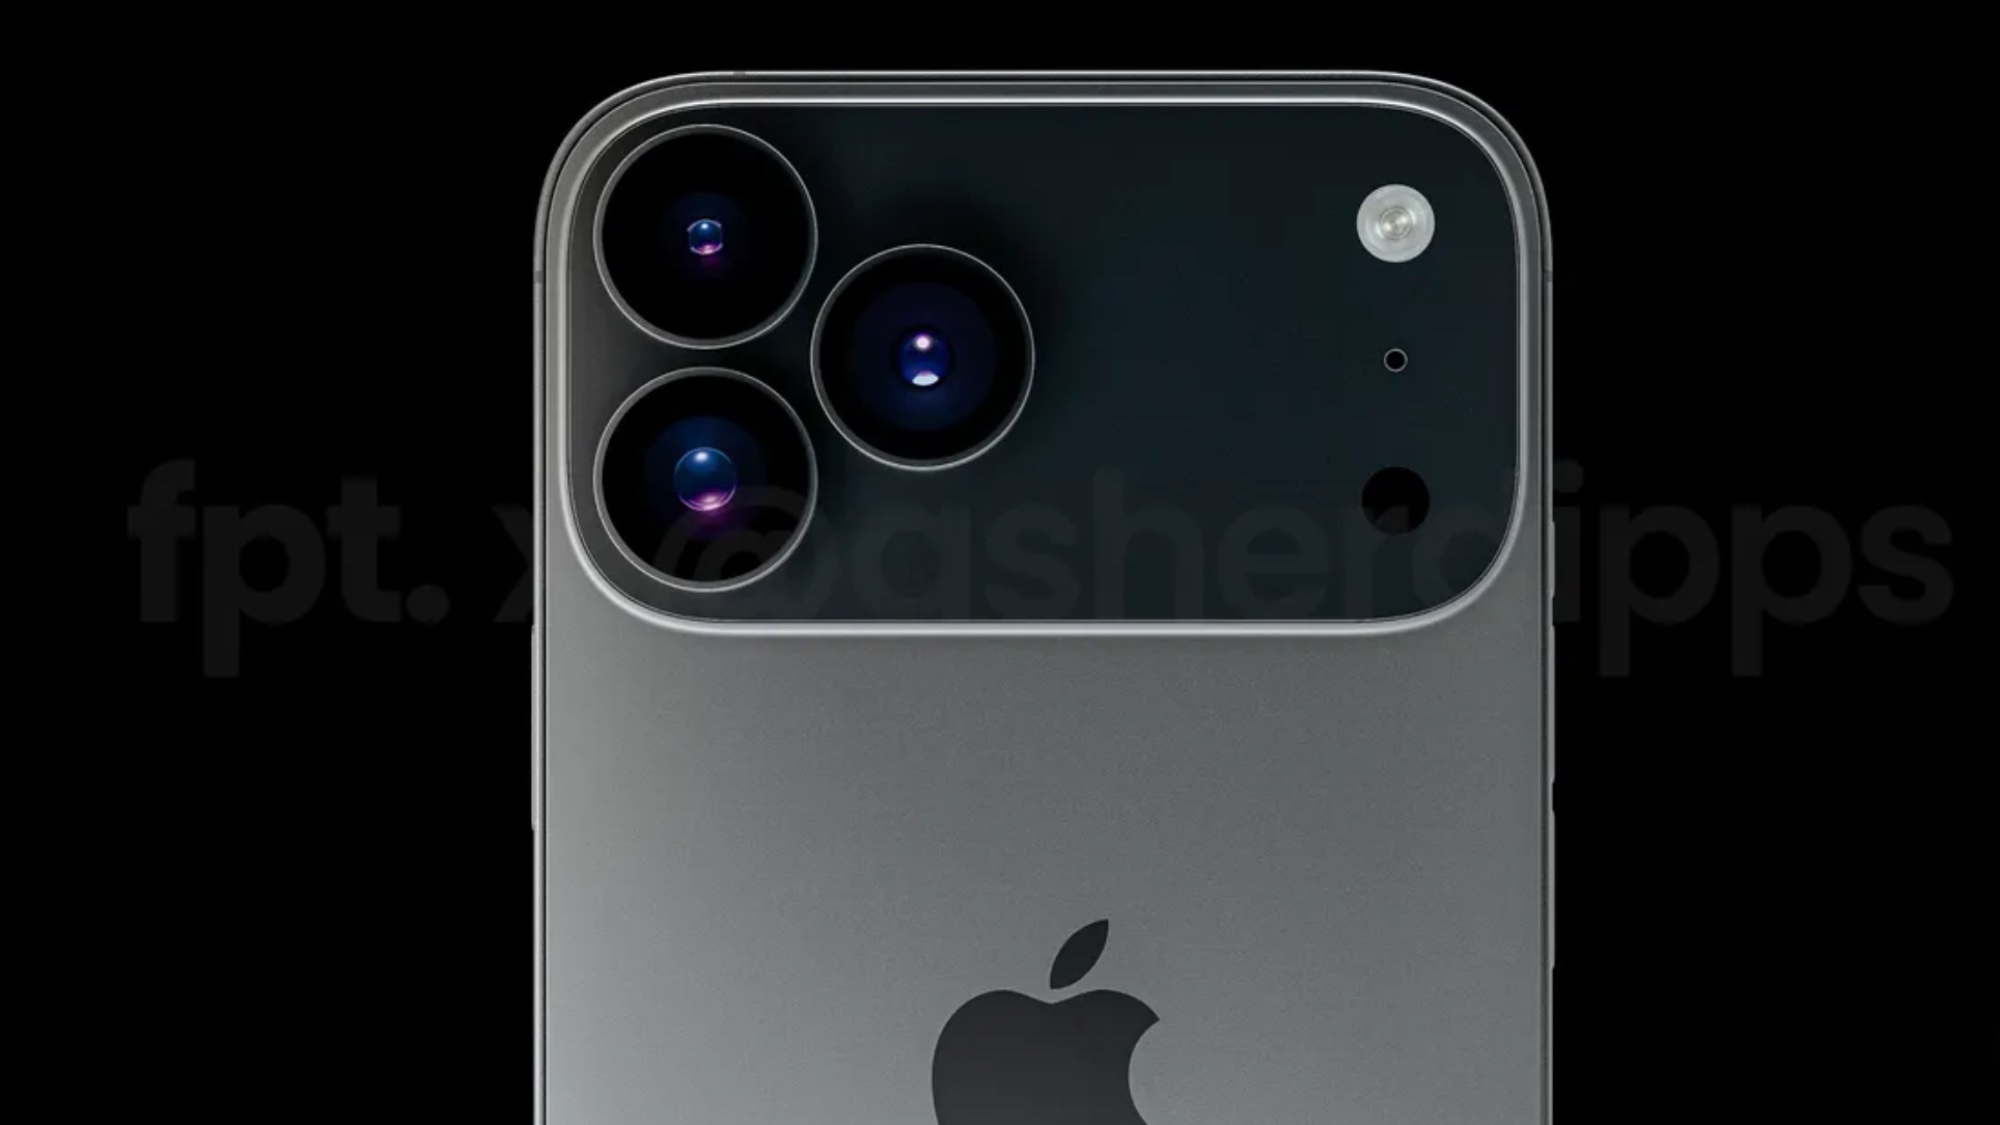
Now, perform a quick pre-flight check: verify satellite signal (look for a solid white icon), ensure obstacle sensors are clean, and confirm gimbal movement is unobstructed. Tap the camera icon in the bottom-right corner to explore shooting modes – you can switch between Auto and Manual, adjust ISO, shutter speed, and white balance using the Parameter Menu. Remember: the Mavic 4 Pro offers three cameras – tap 1X for wide-angle, 2.5X for medium telephoto, or 6X for telephoto zoom. Rotate the screen to shoot in portrait mode, perfect for social media content.
For takeoff, you have two options:
- Auto Takeoff: Tap the takeoff icon on the left side of the screen, then hold the confirmation button. The drone lifts off and hovers at 1.2 meters.
- Manual Takeoff: Push both control sticks inward (or outward) simultaneously to start motors, then gently push the left stick up to ascend.
During flight, remember:
- Left stick up/down = ascend/descend
- Left stick left/right = rotate (yaw)
- Right stick up/down = fly forward/backward
- Right stick left/right = strafe left/right
Use the left dial to tilt the gimbal up or down, and the right dial to zoom smoothly between focal lengths. Half-press the shutter button to autofocus; full-press to capture a photo. Press the record button once to start or stop video recording.
Step 3: Pro Tips
To maximize your experience, enable Return to Home (RTH) before every flight – it’s your safety net. You can trigger it by holding the RTH button on the controller or tapping the RTH icon in DJI Fly and confirming. The drone will return to its last recorded home point and land automatically. Always ensure GPS has a strong lock (at least 10 satellites) for reliable RTH performance.
Take advantage of the RC Pro 2’s advanced features: install third-party apps via the built-in browser or microSD card for expanded functionality. Use the flight simulator to rehearse complex maneuvers risk-free. And if you’re shooting in low light, toggle on the auxiliary light (found in the Parameter Menu) for better subject illumination.
For creators, the 512GB internal storage model supports ALL-I encoding and 10-bit 4:2:2 video – ideal for professional color grading. Check your battery compartment sticker to confirm your storage version. Don’t forget QuickTransfer for fast file downloads to your phone over Wi-Fi!
Common Mistakes to Avoid
- Flying without removing the gimbal protector: This blocks sensors and can cause gimbal errors.
- Skipping firmware updates: Outdated software may disable key features or reduce flight stability.
- Ignoring signal range: Keep the drone within visual line of sight and avoid flying behind large obstacles.
- Using manual controls in Sport mode without caution: Obstacle avoidance is disabled in S mode – fly responsibly.
- Forgetting to check battery before landing: Always reserve at least 20% battery for safe RTH execution.
Tags: DJI Mavic 4 Pro, RC Pro 2, drone tutorial, first flight, camera controls, Return to Home, firmware update, gimbal setup, flight simulator, Hasselblad camera, ALL-I encoding, 10-bit video, QuickTransfer, obstacle avoidance, pre-flight checklist