⚡ The 30-Second Fix
Set your Sony A7 V to Manual mode for video, use 4K 30p with SteadyShot Active ON, and enable AF-C with Eye AF and Tracking for sharp, stable footage. Keep Picture Profiles OFF or use S-Cinetone for natural colors without complex grading.
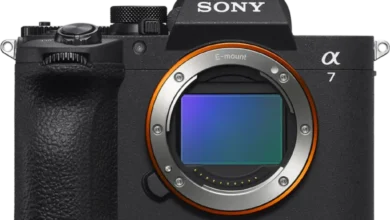
The Sony A7 V is a powerhouse straight out of the box – but its default settings often prioritize flexibility over usability. Without tweaking key video configurations, you risk shaky footage, inconsistent exposure, or missed focus – especially if you’re new to Sony’s menu system or upgrading from an older model like the A7 III or A7 IV.
Prerequisites
- Memory Card: Use a UHS-II V90 SD card (or CFexpress Type A) to handle 4K recording without buffer issues.
- Battery: Fully charged NP-FZ100 – video drains power faster than photos.
- Lens: Any Sony E-mount lens works, but avoid older third-party lenses if relying heavily on AI subject detection.
- Environment: Shoot in temperatures below 35°C (95°F); set Auto Power OFF Temp to “High” in Setup menu to reduce overheating shutdowns.
Phase 1: Setup

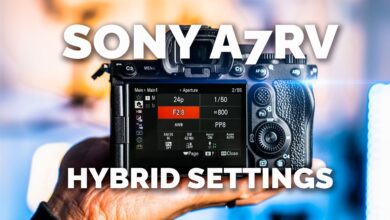
Phase 2: The Settings
- Shooting Mode: Switch to Manual (M) for video – this locks exposure and prevents flickering or sudden brightness shifts during clips.
- Video Resolution & Frame Rate: Choose 4K 30p (QFHD) for the best balance of detail, motion smoothness, and editing compatibility. Avoid 4K 120p unless you need slow motion – it crops to APS-C mode and reduces field of view.
- Record Settings: Set to 4:2:2 10-bit if your editing workflow supports it – this gives maximum color data for grading. Otherwise, stick with 8-bit 4:2:0 for simpler projects.
- SteadyShot: Enable Active mode for handheld walking shots or vlogging. Turn it OFF when using a tripod to avoid artificial stabilization artifacts.
- Autofocus: Use AF-C (Continuous) with Tracking and Eye AF enabled. For best results, assign Eye AF to a custom button for quick activation.
- Exposure Triangle: Match shutter speed to double your frame rate (e.g., 1/60 sec for 30p). Adjust aperture for depth of field, then use Auto ISO with a max limit of 6400–12800 to control noise.
- Picture Profile: Leave OFF for natural, ready-to-use colors – or select S-Cinetone for cinematic warmth without LUTs or post-processing.
- My Menu: Add frequently used items like Focus Mode, ISO, Eye AF, and SteadyShot to your custom My Menu tab for one-touch access.
Troubleshooting
Solution: Ensure AF-C is active and Eye AF is enabled. Avoid wide-area AF in low light – switch to Spot or Expand Flexible Spot for precise focus control.
Tags: Sony A7V video settings, A7V 4K recording, Sony camera setup, mirrorless video guide, A7V autofocus tips, S-Cinetone settings, SteadyShot Active mode, manual video exposure, Sony E-mount lenses, beginner video camera, overheating prevention, Eye AF configuration, 4:2:2 10-bit recording, My Menu customization, handheld video stabilization