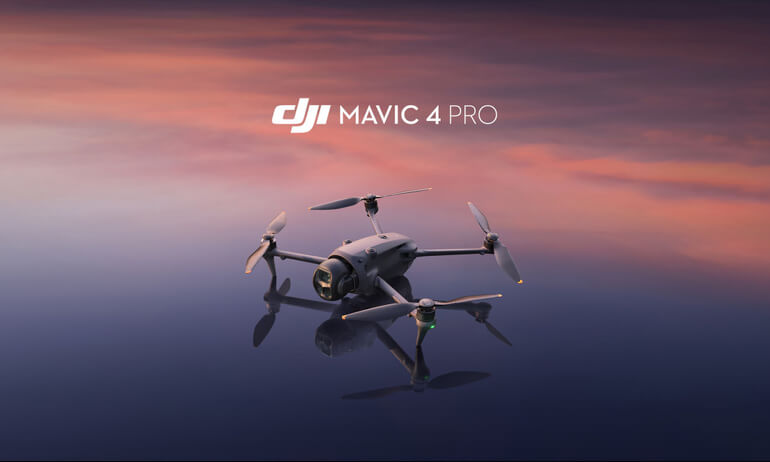
So you’ve just unboxed your shiny new DJI Mavic 4 Pro – congratulations! This powerhouse drone packs pro-level cameras, omnidirectional obstacle sensing, and up to 52 minutes of flight time. But before you soar into cinematic shots or chase golden-hour timelapses, there’s a crucial step: proper setup. Skipping it could mean failed activations, firmware glitches, or even unsafe flights. Whether you’re flying solo or with the Creator Combo, this beginner-friendly guide walks you through every essential step – from unboxing to takeoff – so your first flight is smooth, safe, and stress-free.
Before We Start
- Check your model: The DJI Mavic 4 Pro comes in two storage versions – 64GB (standard) and 512GB (high-capacity). Look for the sticker inside the battery compartment to confirm yours. The 512GB version supports ALL-I encoding and 10-bit 4:2:2 video for richer color grading.
- Download DJI Fly app: Available on iOS and Android. You’ll need it for activation, firmware updates, and flight control.
- Ensure internet connection: Both your mobile device and remote controller must stay online during initial setup and activation.
- Charge everything: Fully charge the drone battery (≈80 mins with 65W charger) and remote controller before starting. Low battery can interrupt critical processes.
- Remove gimbal protector: Don’t forget this! Leaving it on may damage the gimbal or block camera movement.
The First Step
Start by preparing your hardware. Unfold the drone arms gently – note that unfolding the right rear arm automatically powers on the aircraft (a handy feature, but easy to miss if you’re rushing). If it doesn’t turn on, press the power button once to wake the battery, then press and hold for 2 seconds to fully power up.
Next, insert your microSD card – if using one. While the Mavic 4 Pro has generous internal storage (especially the 512GB model), a UHS-I Speed Grade 3 microSD card is recommended for high-bitrate 6K video. The drone will default to internal storage if no card is inserted, but you can choose where to save media in the DJI Fly app later.
Now, power on your remote controller. For the DJI RC Pro 2, simply unfold the antennas and screen – it boots up automatically. For the DJI RC 2, press the power button once to check battery, then press and hold to turn on. If you bought a combo, the remote is pre-linked to the drone. Otherwise, follow the pairing tutorial in the DJI Fly app under “Device Connection.”

Step 2: Configuration
With everything powered on, open the DJI Fly app. You’ll be prompted to activate your drone – this binds it to your DJI account and enables full functionality. Follow the on-screen steps carefully. Activation requires internet and takes just a few minutes. Once done, check your warranty status and DJI Care benefits under “Device Info” in the app.
Next, update the firmware. DJI frequently releases improvements for flight stability, camera performance, and safety features. A prompt will appear if an update is available. Tap “Update Now” and let it run – do NOT power off the drone or close the app during this process. After completion, the drone will shut down automatically; restart it manually.
Now, configure safety settings. Go to Safety > Obstacle Avoidance in DJI Fly. Set the action to Brake (stops the drone) or Bypass (goes around obstacles) – avoid turning it off unless absolutely necessary. Also, set your RTH (Return-to-Home) altitude higher than any nearby buildings or trees (e.g., 100–150m). This ensures the drone clears obstacles when returning automatically.
Finally, test your connection. Make sure the satellite signal icon stays white (indicating strong GPS lock) and the video transmission is stable. If using DJI RC Pro 2, explore its advanced features like HDMI output for live monitoring or installing third-party apps via APK files – but stick to trusted sources.
Step 3: Pro Tips
Common Mistakes to Avoid
- Flying without GPS lock: Always wait for the satellite icon to turn white. Flying in ATTI mode (no GPS) increases crash risk.
- Ignoring obstacle avoidance limits: The vision system struggles over water, glass, dark surfaces, or thin branches – even with LiDAR and infrared sensors.
- Using slow microSD cards: Low-grade cards cause recording errors in 6K. Stick to UHS-I Speed Grade 3 or higher.
- Charging in extreme temps: Never charge below 5°C (41°F) or above 40°C (104°F) – it degrades battery health.
- Skipping firmware updates: Outdated firmware may disable new features or compromise safety systems.
Tags: DJI Mavic 4 Pro, drone setup guide, beginner drone tutorial, DJI Fly app, firmware update, obstacle avoidance, microSD card requirements, battery charging, RC Pro 2, 6K video recording, vertical shooting, flight simulator, RTH altitude, activation process, safe drone flying